Now, i want to share my experienced in hosting multiple websites on your VPS that running Centos 6 64 Bit, using Virtualmin as web management. In previous tutorial, i have share how to install wordpress in VPS, and if you follow my tutorial from beginning (all tutorial are in this blog, just visit angelimus.blogspot.com) i have install many packages to my VPS and NOT Using Fresh Install to Install Virtualmin, so there are a few thing can cause trouble in future, but it's not a big deal, i believe that every problem has a way out.
Since installing Virtualmin, i use VPS from Evoburst.com, cause it have more than enough RAM and CPU Resource.
Now, after through the "boring part" (Tutorial Post-Installation Wizard Virtualmin) but maybe the important ones.
If in your VPS you install SSH Dropbear (Part 5 - Installing SSH Dropbear on Centos 6 64Bit), then you must follow this tutorial from Step 1, if you not installing SSH Dropbear, just skip this step, and go to Step 2
Step 1 : Solving conflict on Port 443 between SSH and SSL
Open your terminal
sed -i 's/OPTIONS="-p 443"/OPTIONS="-p 444"/g' /etc/init.d/dropbearNow your port for SSH Dropbear is "444", conflict solved.
Step 2 : Register free domain at freenom.com
(If you already have registed domain you want to use, like mynewvps.com or mywebhost.com, etc, the point is it registered and still active, then you can skip this Step, go to Step 3)
- Open your browser, and go to http://www.frenom.com (why freenom? because it free, no cost at all, and this is for testing purpose).
- Find domain you like, then click check availability, choose from the list thats free, (see pic below)
- Click Checkout
- Click USE DNS, in type your VPS ip address there, type the same ip addpress on both. (see picture below)
- Click continue, and follow the instruction until finish.
Step 3 : Host Multiple Website
Open your browser, and go to Virtualmin by type
https://<vps ip address>:10000/1. Login with username = root and password = (your root password)
2. i assume you already done step (Tutorial Post-Installation Wizard Virtualmin)
3. See on left panel, Click on Create Virtual Server (see image below)
4. After click it, see on right panel
Domain name (from freenom.com) = angelimusvps.tk
Description = (type anything you like, eq web1, etc)
Administration password = (type anything you like, eq passweb1, etc)
Administration username = Choose Custom Username and write (from freenom) angelimusvps.tk
Custom username is directory name where your public_html or your directory for website files.
eg: if you type angelimusvps on Custom username, and then in number 7 below, it must be
cd /home/angelimusvps/public_html/
I highly recomended that you using Custom Username same as your Domain name for beginning, so it will not confuse you in the future.
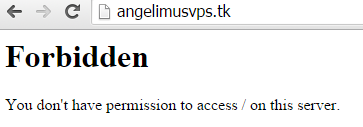
5. Open your browser, try input your domain from freenom (my domain is angelimusvps.tk)
6. It show Forbidden, because there are no website file
7. Now Open your terminal, type
cd /home/angelimusvps.tk/public_html/Note : change angelimusvps.tk with your created domain
echo "This is My First Website using Virtualmin - angelimus.blogpsot.com" >> index.html
8. Try open your browser again, and type your domain
9. Now you're done,
10. To Create Multiple website, just go to Step 1
when you get stuck into trouble, just take a rest a while... because in the same time, you already resolve it without knowing it


0 comments:
Post a Comment