

Before we start manage, we must know exactly what is in our VPS at VPS.me, ex : How big the storage is?, How many memory that we can use?, How fast is the processor?, How much bandwidth that we can use? the most important things is we must make sure our VPS is RUNNING, not in SUSPEND mode. Lets start!!!
1. Login to your VPS.me account and click My Servers tab (see previuos Start a VPS)
2. You will see this ( see picture below )

Make sure your VPS status is Running, and your OS is Centos 6 64Bit,
3. And on the left you'll see this ( see picture below )

Reboot : click it to reboot your server, in case there are something happened or you server doing a heavy activity or anything, just like your home PC, when your PC became slow, the first thing to do is restart your PC, if still slow, then we must start investigate what happened.
Start : click it to start runing your VPS, maybe your server suddenly stop because you gave shutdown command from terminal or an application for your server to stop or anything.
Stop : click it to stop your server, this not too usefull, but sometime you need it to prevent suspend to your vps, or if you want to change setting on control panel that required stopping your VPS for a while, stop activity will make your VPS down until you start it again. I usually using stop when bandwidth almost reach the quota 10 GB.
Quota bandwidth in this server (VPS.me) is very small, 10 GB, but it because we use free service, in paid service of VPS.me it offer more bandwidth, paid service offering more powerfull resource, not only in VPS.me, but another host like DigitalOcean.com or Bluehost.com or other VPS host.

this paid service of VPS.me with $9.95 /month

www.DigitalOcean.com pricing table.

www.BlueHost.com pricing table.
As we can see from three image above about pricing, with $9-$14 you get diffrent specification of resource for your VPS.
Okay, continue to topic.

Root : This is for change your Root Password
OS : Use this feature if you want to change your OS, ex: You install Centos 6 32 Bit, because of my series tutorial using Centos 6 64 Bit, you can reinstall to Centos 6 64Bit using this feature, what you need is only click your mouse, this is common feature provided by the host, almost all VPS host has this feature, but maybe diffrent way to access it, so don't worry if you use another service from another host.
Hostname : In this you can change your hostname to other name you like (eg: server.mynewvps.com, etc)

Now this is the crucial part.
SSH : if you click this, you will be explained how to connect your server using SSH with Putty. (Dont worry, just wait, i'll create the tuts later) >> see Part 2 : Connect VPS using PuTTY
IPv4 Mapping : using this to redirect the port in / out your server (I will explain later, just wait :P) >> see Part 4 - Installing Wordpress to Centos 6 64Bit

In here you can see info about your VPS resource
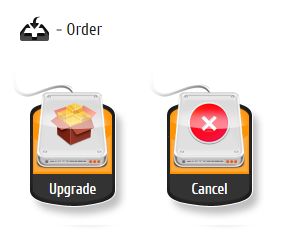
Upgrade : If you plan to use paid service, you can upgrade it
Cancel : You can stop your free service here, use this feature to stop or delete your VPS if you dont need it anymore, so other people can still use free VPS service from VPS.me
I think thats all about manage your Free VPS, see you in next tutorial.
Many good VPS out there with diffrent specification, you decide it which one that cover what you need
0 comments:
Post a Comment